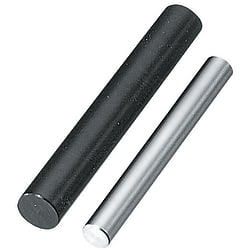
Rotary Axes / Optional Machining (Part Numbers - CAD Download)
- Order quantities extended (D-JIT)
Part Number
Once your search is narrowed to one product,
the corresponding part number is displayed here.
- Drawing / Specifications
- 3D Preview 3D preview is available after complete configuration
- Part Numbers
- Catalog
- Technical Information
Dimensional Drawing

[ ! ] Surface roughness of Part D for h9 (Cold-drawn) is
 . Surface roughness for h7 (Ground) and g6 (Ground) is
  .
.[ ! ] High hardness stainless steel may have a center hole.

[ ! ] Circularity and straightness of Part D are not applicable to h9 (Cold-drawn).
| D | Circularity M | |
| over | or Less | |
| 1 | 2.5 | 0.006 |
| 3 | 13 | 0.004 |
| 13 | 20 | 0.005 |
| 20 | 40 | 0.006 |
| 40 | 50 | 0.007 |
| D | Straightness K |
| 2·2.5 | 0.1 |
| 3·4 | 0.03 |
| 5 | 0.02 |
| 6 or more | 0.01 |
| Dimension | Dimension Tolerance | |
| over | or Less | |
| 14 | 30 | ±0.2 |
| 30 | 120 | ±0.3 |
| 120 | 400 | ±0.5 |
| 400 | 1000 | ±0.8 |
Product Specifications
| Type | D Tolerance | [M] Material | [S] Surface Treatment | |
| (1) | NSFMR | h9 (Cold-drawn) | EN 1.1191 Equiv. | — |
| SFMR | Black Oxide | |||
| PSFMR | Electroless Nickel Plating | |||
| SSFMR | EN 1.4301 Equiv. | — | ||
| (2) | NSFHR | h7 (Ground) | EN 1.1191 Equiv. | — |
| SFHR | Black Oxide | |||
| PSFHR | Electroless Nickel Plating | |||
| SSFHR | EN 1.4301 Equiv. | — | ||
| (3) | NSFR | g6 (Ground) | EN 1.1191 Equiv. | — |
| SFR | Black Oxide | |||
| PSFR | Electroless Nickel Plating | |||
| SSFR | EN 1.4301 Equiv. | — | ||
| HFR | EN 1.7220 Equiv. [H]Hardness: 30 to 35HRC | Black Oxide | ||
| PHFR | Electroless Nickel Plating | |||
| AHFR | High Hardness Stainless Steel [H]Hardness: 35HRC or More | — | ||
Specification Table
| Part Number | — | L |
| SFMR15 PSFHR20 | — — | 150 300 |
| Part Number | L 0.1 mm Increments | ||
| Type | Dh9 | ||
| NSFMR SFMR PSFMR SSFMR (D13, 17, 18 or 22 is not available for SSFMR.) | 3 | 0 −0.025 | 15.0 to 150.0 |
| 4 | 0 −0.030 | 15.0 to 200.0 | |
| 5 | 15.0 to 250.0 | ||
| 6 | 15.0 to 500.0 | ||
| 8 | 0 −0.036 | 15.0 to 500.0 | |
| 10 | 15.0 to 800.0 | ||
| 12 | 0 −0.043 | 15.0 to 900.0 | |
| 13 | 15.0 to 900.0 | ||
| 15 | 15.0 to 1000.0 | ||
| 16 | 15.0 to 1000.0 | ||
| 17 | 20.0 to 1000.0 | ||
| 18 | 20.0 to 1000.0 | ||
| 20 | 0 −0.052 | 20.0 to 1000.0 | |
| 22 | 20.0 to 1000.0 | ||
| 25 | 20.0 to 1000.0 | ||
| 30 | 20.0 to 1000.0 | ||
| 35 | 0 −0.062 | 70.0 to 1000.0 | |
| 40 | 80.0 to 1000.0 | ||
| 50 | 100.0 to 1000.0 | ||
(2) h7 (Ground)
| Part Number | L 0.1 mm Increments | ||
| Type | Dh7 | ||
| NSFHR SFHR PSFHR SSFHR | 3 | 0 −0.010 | 15.0 to 150.0 |
| 4 | 0 −0.012 | 15.0 to 200.0 | |
| 5 | 15.0 to 250.0 | ||
| 6 | 15.0 to 500.0 | ||
| 8 | 0 −0.015 | 15.0 to 500.0 | |
| 10 | 15.0 to 800.0 | ||
| 12 | 0 −0.018 | 15.0 to 900.0 | |
| 15 | 15.0 to 1000.0 | ||
| 17 | 20.0 to 1000.0 | ||
| 20 | 0 −0.021 | 20.0 to 1000.0 | |
| 25 | 20.0 to 1000.0 | ||
| 30 | 20.0 to 1000.0 | ||
| 35 | 0 −0.025 | 70.0 to 1000.0 | |
| 40 | 80.0 to 1000.0 | ||
| 50 | 100.0 to 1000.0 | ||
(3) g6 (Ground)
| Part Number | L 0.1 mm Increments | ||||
| Type | Dg6 | ||||
| NSFR SFR PSFR SSFR HFR (D15, 20, 25, 30, 35, 40 or 50 is not available for HFR) PHFR (D15, 20, 25, 30, 35, 40 or 50 is not available for PHFR) AHFR (Only * marked numbers are available.) | 2 | −0.002 −0.008 | 15.0 to 50.0 | ||
| 2.5 | 15.0 to 50.0 | ||||
| * | 3 | 15.0 to 150.0 | |||
| * | 4 | −0.004 −0.012 | 15.0 to 200.0 | ||
| * | 5 | 15.0 to 250.0 | |||
| * | 6 | 15.0 to 500.0 | |||
| * | 8 | −0.005 −0.014 | 15.0 to 500.0 | ||
| * | 10 | 15.0 to 800.0 | |||
| * | 12 | −0.006 −0.017 | 15.0 to 900.0 | ||
| 13 | 15.0 to 900.0 | ||||
| * | 15 | 15.0 to 1000.0 | |||
| * | 16 | 15.0 to 1000.0 | |||
| 17 | 20.0 to 1000.0 | ||||
| 18 | 20.0 to 1000.0 | ||||
| * | 20 | −0.007 −0.020 | 20.0 to 1000.0 | ||
| 22 | 20.0 to 1000.0 | ||||
| * | 25 | 20.0 to 1000.0 | |||
| 30 | 20.0 to 1000.0 | ||||
| 35 | −0.009 −0.025 | 70.0 to 1000.0 | |||
| 40 | 80.0 to 1000.0 | ||||
| 50 | 100.0 to 1000.0 | ||||
Alterations
| Alterations Code | Alteration Details | Applicable Conditions | Ordering Example | ||||||||||||||||||||||
| KC | Keyway at One Location  | KC, A = 0.1 mm Increments [ ! ] When the keyway position is less than 1 mm away from the end face, [ NG ] Not applicable when Shaft Dia. ≤ ø5 | PSFMR30-250-KC50-A10 | ||||||||||||||||||||||
| WKC | Keyways at Two Locations | WKC, C, K, E = 0.1 mm Increments [ ! ] When the keyway position is less than 1 mm away from the end face, [ NG ] Not applicable when Shaft Dia. ≤ ø5 | PSFMR30-250-WKC5-C20-K5-E10 | ||||||||||||||||||||||
| KZ | Keyway (1 Location (for 4th Location)) | KZ, Z = 0.1 mm Increments [ ! ] When the keyway position is less than 1 mm away from the end face, [ ! ] Applicable only when combined with both KC and WKC | PSFMR30-250-KC5-A10-WKC20-C10 -K60-E10-KZ100-Z10 | ||||||||||||||||||||||
| FC | Set Screw Flat at One Location | FC, G = 1 mm Increments [ ! ] Not applicable when Shaft Dia. = ø2 or ø2.5 [ ! ] G ≤ 70 | PSFMR30-250-FC10-G3 | ||||||||||||||||||||||
| WFC | Set Screw Flats at Two Locations | WFC, J, W, V = 1 mm Increments [ ! ] Not applicable when Shaft Dia. = ø2 or ø2.5 [ ! ] J, V ≤ 70 | PSFMR30-250-WFC10-J15-W10-V20 | ||||||||||||||||||||||
| SFC | Set Screw Flat, 2 Set Screw Flats (Angle Specified) | SFC, SG = 1 mm Increments AG = 15° Increments [ ! ] Not applicable when Shaft Dia. = ø2 or ø2.5 [ ! ] SG ≤ 70 | PSFMR30-250-SFC10-SG3-AG120 | ||||||||||||||||||||||
| KWC | Set Screw Flat, 2 Set Screw Flats on Both Ends | KWC = 1 mm Increments [ NG ] Not applicable when Shaft Dia. ≤ ø6, when D = 13, 16, 17, 18 or 22 [ NG ] Not applicable when L > 680 | PSFMR30-250-KWC10 | ||||||||||||||||||||||
| WC | Set Screw Flat, Chamfering Depth Configurable | WC = 0.1 mm Increments [ NG ] Not applicable when Shaft Dia. ≤ ø6, when D = 13, 16, 17, 18 or 22 [ NG ] Not applicable when L > 680 [ ! ] Only when KWC is specified, WC is available
| PSFMR30-250-KWC10-WC22.0 | ||||||||||||||||||||||
| TA·TB | Retaining Ring Groove | TA, TB = 0.1 mm Increments [ ! ]2 ≤ TA·TB ≤ 150 | PSFMR30-250-TA10 | ||||||||||||||||||||||
| UC | Slit Cam Groove | UC = 1 mm Increments [ NG ] Not applicable when Shaft Dia. = ø2 or ø2.5 or when D ≥ 13 [ NG ] Not applicable to AHFR | PSFMR10-250-UC10 | ||||||||||||||||||||||
| LKC | L Dimension Tolerance Change | L < 500···L±0.05 L ≥ 500···L±0.1 [ NG ] Not applicable when L ≥ 800 | PSFMR30-250-LKC | ||||||||||||||||||||||
| SC | Wrench Flats | SC = 1 mm Increments [ NG ] Not applicable when D ≤ 5 | PSFMR30-250-SC10 | ||||||||||||||||||||||
| CD | Changes Part D Chamfering | Changes Part D Chamfering Size * Select CD from table [ ! ] Only values provided on the Applicable Dia. Table are applicable
| PSFMR30-250-CD3 |
[ ! ] When multiple keyways or set screw flats are specified, they are added in the same plane. When the distance of the alterations are over 500 mm, ± 2 degree phase difference may occur.
Keyway Dimensions
|  | ||||||||||||||||||||||||||||||||||||||||||||||
[ ! ] If 3 keyways are required, use both KC and WKC.
[!] If 4 keyways are required, use KC, WKC, and KZ. (KZ is applicable only when combined with both KC and WKC)
[NG] Not applicable to D = 2 to 5.
[ ! ] The example below shows the keyway shape for the specs KC, WKC, K = 0, KC + A ≥ L and WKC + C + K + E > L.

[ ! ] When the keyway position is less than 1 mm away from the end face, R is not applied.

Detailed Retaining Ring Groove Dimensions for Rotary Shafts
|
| 
| |||||||||||||||||||||||||||||||||||||||||||||||||||||||||||||||||||||||||||||||||||||||||||||||||||||||||||||||||||||||||||||||||||||||
[ ! ] An applicable retaining ring is included in the retaining ring groove.
| D | Center Hardness (HRC) |
| 3 | 35 or More |
| 4 | 35 or More |
| 5 | 35 or More |
| 6 | 35 or More |
| 8 | 35 or More |
| 10 | 30 or More |
| 12 | 30 or More |
| 15 | 30 or More |
| 16 | 30 or More |
| 20 | 25 or More |
| 25 | 25 or More |
| Material | Tensile Strength (Mpa) | Yielding Point (0.2% Proof Stress) (MPa) | Young's Modulus (GPa) | Transverse Modulus (GPa) | Poisson Ratio |
| EN 1.1191 Equiv. | 570 or More | 345 or More | 200 or More | 77 or More | 0.3 |
| EN 1.4301 Equiv. | 520 or More | 210 or More | 193 or More | 74 or More | 0.3 |
| EN 1.7220 Equiv. | 930 or More | 785 or More | 206 or More | 79 or More | 0.3 |
| High Hardness Stainless Steel | 1102 | 715 | 199 | 77 | 0.3 |
High Hardness Stainless Steel Material Properties
(Unit: %)
| C | Si | Mn | P | S | Ni | Cr |
| 0.15-0.25 | ≤ 0.50 | 7.5-9.5 | ≤ 0.05 | ≥ 0.12 | 1.5-3.0 | 13-15 |
Part Number:
- In order to open the 3D preview, the part number must be fixed.
3D preview is not available, because the part number has not yet been determined.
Part Number
|
|---|
| SSFR40-[80-1000/0.1] |
| SSFR50-[100-1000/0.1] |
| Part Number |
Standard Unit Price
| Minimum order quantity | Volume Discount | RoHS | Material | Hardness | Surface Treatment | Material Details | D Tolerance | Shaft Dia. D (mm) | Length L (mm) | |
|---|---|---|---|---|---|---|---|---|---|---|---|---|
- | 1 | 6 Days | 10 | [Stainless Steel] EN 1.4301 Equiv. | No Hardened | NA | - | g6 (Ground) | 40 | 80 ~ 1000 | ||
- | 1 | 6 Days | 10 | [Stainless Steel] EN 1.4301 Equiv. | No Hardened | NA | - | g6 (Ground) | 50 | 100 ~ 1000 |
Loading...
Basic information
| Basic Shape | Straight | Environmentally friendly | RoHS Compliant (10 Substances) | End Shape (Left) | Straight |
|---|---|---|---|---|---|
| Characteristics/Applications | Not Applicable | End Shape (Right) | Straight | Keyway | Keyway Option (Alteration) |
| Cleaning Method | No Cleaning | Wrench Flats | Wrench flats option (alteration) |
Configure
Basic Attributes
-
Material
- Steel
- Stainless Steel
- Steel
-
Hardness
- No Hardened
- Hardened
-
Surface Treatment
- NA
- Surface Treatment Provided
-
Material Details
- EN 1.1191 Equiv.
- EN 1.4301 Equiv.
-
D Tolerance
- h9 (Cold-drawn)
- h7 (Ground)
- g6 (Ground)
-
Shaft Dia. D(mm)
-
Length L(mm)
-
Type
- AHFR
- HFR
- NSFHR
- NSFMR
- NSFR
- PHFR
- PSFHR
- PSFMR
- PSFR
- SFHR
- SFMR
- SFR
- SSFHR
- SSFMR
- SSFR
-
Filter by CAD data type
- 2D
- 3D
Filter by standard shipping days
-
- All
- 4 Days or Less
- 5 Days or Less
- 6 Days or Less
- 9 Days or Less
Optional Attributes
- The specifications and dimensions of some parts may not be fully covered. For exact details, refer to manufacturer catalogs .
Complementary Products
Tech Support
- Technical Support
- Tel:+49 69 668173-0 / FAX:+49 69 668173-360
- Technical Inquiry


